Monday, August 22, 2011

What to do with my produce?

I've been writing some blogs for work at Mountain Valley Seed Co..Here's my latest one.

So is anyone else having trouble keeping up with the produce in their garden? I’m so excited for harvest season- you finally get to see the fruits (literally) of all your labors! My tomatoes are finally changing color, the basil is getting bushier, I’ve been harvesting beans and cucumbers the last month or so, my peppers are going crazy and now I’ve got zucchini to deal with…. Along with the steady supply of kale, chard, beets, micro greens and carrots supplied in my CSA from BUG Farms, I’ve started falling behind in actually eating and preserving all of this nutritiousness.

And it’s just the beginning of harvest season!

So what to do? Tell me. How do I keep all this stuff from going to waste? Eat more veggies right? And maybe do some canning or something? Right. But it’s not that easy, as I’m sure you all know. Don’t get me wrong, I do my fair share of veggie crunching, but you can only eat so many raw veggies before needing a change in texture. Let’s face it, a lot of veggies taste better when they’re cooked or prepared in interesting and delicious ways. That’s why humans invented the art of cooking- and it is an art! As much time as we’ve all spent on our garden, now we’ve got to put just as much effort into cooking, preserving, freezing, drying and eating our yummy fruits and veggies.

So let’s make a deal and help each other. I’ll share some recipes if you share yours!

Together we will become culinary artists of the masterful kind.

Here are some ideas I’ve come up with so far:

Fresh Bruschetta- one of my all time favorites!

Baguette, olive oil, fresh mozzarella, garden fresh tomatoes and basil leaves, salt, pepper.

Slice fresh baguette, brush or rub with olive oil, add a slice of fresh mozzerella, tomato, salt and pepper. Put basil leaves on top. Enjoy!


Shredded Beet and Carrot Salad

I haven’t tried this one yet, but I have a lot of beets and carrots to eat. Doesn’t it look beautiful? Check out the link. I think adding apples to this would be delicious.

Kale Chips

Put parchment paper or aluminum foil on baking pan. Chop stems off kale, chop in smaller pieces if you’d like. Drizzle and toss with olive oil. Add salt and pepper to taste or Cajun seasoning. Bake at 400 F until crispy or desired texture. About 15-20 min.

Sauteed beans and greens

Chop and string beans, chop off stems and chop up kale, chard, pok choi and/or spinach greens. Saute garlic first in butter or oil, then add beans. After 5 min add greens. Saute for about 5-10 more min, just until wilted and bright green- don’t over cook.

Veggie Lasagna with Zucchini and Chard

I made this last week and it was amazing! The recipe is in “Vegetarian Cooking for Everyone” by Deborah Madison I substituted the eggplant for zucchini.

Pickles, “Dilly Beans” and Pickled Peppers

I use this recipe for all three except I add a spicy pepper per jar, grape leaves (1-2 per jar) and sometimes powdered alum (these two help keep them crunchy). I like to cut the cucumbers into spears and cut off the ends. The beans I cut off the ends. The peppers I put in the jar whole.

Here’s a great resource I found about freezing, drying, canning and storing produce from Wasatch Community Gardens…

Also some good canning and preserving info from Utah State University Extension.

I need to do more freezing. And get a bigger freezer. Freezer salsa is next on the list!

Ok, now it’s your turn. What do you do with all of your produce?

Friday, August 12, 2011

News from the pumpkin

So let me start off by saying….I feel a little embarrassed. Maybe that’s why I haven’t written for a while.

Here’s what my “giant” pumpkin looks like right now:

And here’s what an experienced giant pumpkin grower’s giant pumpkin looks like right now:

The bees are doing there job, so that’s not the problem.


I’m just a little behind…What can I say, I’m a beginner at growing gigantic pumpkins. And I got a late start this spring….Hey, we all learn from our mistakes. Before you throw me a pity party, let’s remind ourselves that my goal was to grow a pumpkin boat, which if I’m not being too idealistic, I think I might be able to pull off with maybe 200-300 lb pumpkin. Maybe. The experienced pumpkin growers, like the one growing the beautiful pumpkin above, on the other hand, are looking to grow a record breaking pumpkin- upwards of 1000 lbs! So hey, let’s not give up hope for my little pumpkin quite yet. I’ve still got some time right? Even if it frosts in September as it sometimes does, I’ve got a whole month of growth left.. If mine grows as fast as most giant pumpkins do, I think I should be able to pull off at least a tiny version of a giant pumpkin in comparison….If the frost stays away till October, which it sometimes does, I might even still have a chance at growing that pumpkin boat I’ve been dreaming about. Who knows?

Keep your fingers crosses and let’s wait and see!

Lessons from the giant pumpkin:

-Get a head start. Build a hoop house; start the pumpkin in the hoop house in April.

-Be diligent about training the vines (let the main vine grow straight down the middle, and carefully but diligently bury the secondary vines to help grow more roots and bring up more nutrients from the soil). I started doing this, but haven’t kept up with it…giant pumpkin growing can be a full time job. Already have one of those:)!

-Don’t grow anything else in your pumpkin patch
(you can see in my picture that I let some volunteer tomatoes and other squash grow in the same space [remember all of that fresh compost I added to my new garden? looks like it was full of seeds!] – they’re doing well but taking nutrients away from the pumpkin plant).

-Don’t give up hope! Keep fertilizing and maintaining your pumpkin patch even if you get behind:)

-Krystal

Tuesday, June 07, 2011

It's Alive!

Ok folks, I think we're getting somewhere...
Look!


YAY!

Now if this sun would stick keep on stickin' around, we'll be in business...
Giant pumpkin, don't fail me now. Stay tuned for future progress!

In the meantime, here's a cute little story I wrote a week or two ago. Enjoy.


One day my seed sprouted! (remember my seed?)
I believe it was a Friday. In May. Possibly the 13th of May even... Hooray!

I shoveled some compost.
I turned the soil. Then I raked it in.


I finished my garden bed!
I planted my giant sprouted seed. It was a beautiful sunny day.

I planted my seed inside a warm and cozy wall of water.
I planted another un-sprouted seed next store. Just in case...


Then It rained. And it rained some more.
The sun was hiding.
And it was cold.
And it rained some more.
I checked my wall of waters every day. No green leaves popping out of the soil yet...


I bought a couple more seeds. Just in case...and started them inside.
And I waited. and waited...
Still no green.


I started germinating a few more seeds inside. Just in case....

And me and my seed have been waiting....Still waiting...
Waiting for the sun...to warm up the soil.
Still sitting here, patiently. Waiting for the sun.
Maybe that's what hoop houses are for?
Sunshine, oh sunshine, please come back!

Friday, May 13, 2011

My Ginormous pumpkin- episode 2

Day....13 Ok, so here's the update on my giant pumpkin: no germination. What?! This is why I write the blog- and you guys read it. So you can NOT do what I did. Right? Right.

So as you may have read, I tried germinating one of my two gigantic pumpkin seeds in some potting soil on top of the fridge. After a couple of pretty gloomy days (remember last week?), I decided to move the pot near our south facing window when we were expecting some sunny days (finally!). Another couple days go by and...nothing. I knew the soil temperature probably wasn't the ideal warmth that pumpkin seeds prefer, but I figured a week and it would get there. Day 7, still nothing. This is when I decided I needed to get a little more serious about this. So I decided to give in and do what the President of the Utah Pumpkin Growers Association (Andrew Israelsen, one of his seeds I am growing) does with his seeds- put the pot inside a cooler with 2 quart jars of warm water to get the soil temperature up and encourage faster germination. I even added a home made heating pad for extra warmth (you know those been filled bags you put in the microwave?). This would surely work!


The 4 " pot is the pumpkin seed, the other two are some herbs I started germinating the same day.

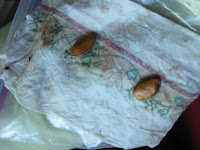
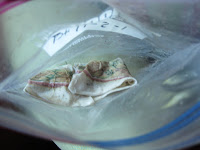
I used this method for two days and still....nothing. How could this be possible? Not being scientific enough I am sure. What can I say, I'm more intuitive than scientific, I admit it. Well, I couldn't take it any more, so decided to dump the pot(literally) and try the elementary school method instead: wet paper towel in a zip lock (unsealed for air flow). When I looked at the seed it had not begun to sprout at all! Okay paper towel, don't fail me now. I decided to add my second pumpkin seed in the same damp paper towel, about 3 inches apart. It's been 3 days since the I've done this...Andrew's take 4 days to germinate so maybe tomorrow is my lucky day? My plan is to transplant them both outside once they germinate. I will warm the soil around them with milk jugs filled with water to create a mini greenhouse effect. Maybe I'll even cover them with some clear plastic.

In the meantime, I still have the new garden space to deal with...So this is what I did on Sunday:


I dug up the other half of my "garden space" (the other side of the wheelbarrow in the picture). The weather was actually perfect for the pick axing, shoveling, hauling and raking required- ominous rain clouds in the distance, overcast skies, and a cool, gentle breeze. Ahh, nothing like pick axing rocks for three hours on a sunday morning, i don't think it would be accurate to call it rocky "soil." Some sand and lots of rocks is more like it. :)
To be honest, it kind of made me feel like one of the dwarves in disney's Snow White.

Except where they were in fact digging in rock to find sparkly gemsI was just trying to make soil out of rocks. Most of the time I felt like grumpy. Now I understand why grumpy was so grumpy- blisters on your hands, back breaking swings, dirt down your back, rock dust in your eye...This pick axing business is not easy. So maybe a tiller would've been way easier- but I think it would've broken in about 5 sec. Maybe if I had a tractor...Since I don't...

The chickens decided that they wanted to help, so while I was swinging my pick axe with all of my strength, I had to dodge chicken heads that were racing each other to eat the worms in the earth I had just loosened. Brave chickens. Or maybe just stupid. More likely. They do scratch around a little and add some fertilizer here and there, so I suppose I'll give them some credit for helping right? I'm just glad I didn't gouge one with the axe.


Once I did all the loosening I could do (which ended up probably only being about six inches deep, if even), I sifting out fist sized rocks, some left over asphalt crumbles, big roots, and misc. trash like strips of plastic bag, candy wrappers and pieces of rotting boards (if you ever see our house, you will accept that it has an unusual history and pieced together landscaping design at best). Anyways, once I raked it out all the "soil" into a long rectangle shape and leveled it out, I measure it. About 8' x 25'. That should do it eh? The bigger question is: does this soil have enough nutrients and root space to grow a gigantic pumpkin? Guess we'll find out. I added 6 bags of top soil (1.5 cubic feet) and 1 bag of eco compost that I got from Home Depot. This is a constant balancing act that I am doing- how much am I willing to spend to grow a giant pumpkin? Seeing as I work two part time jobs and don't make an executive's salary, as little as possible. So far I've spent about $20 on soil and compost. For the size of the space, I could've spent 4 times that plus delivery fee. The soil could use a lot more love, but I'm hoping that once I add the compost from last year's compost pile (rich with year old chicken manure, egg shells and veggie scraps) that should be enough to grow a plant. Maybe even a giant plant?

I've got to fix the flax tire on the wheelbarrow first. Then empty the rocks. Then shovel compost.

After that I can:

-Add on new irrigation tubes
-Fix the timer wire that I pick axed through
-Build a hoophouse, buy some wall-o-waters, or drink a lot more milk
-Plant the seeds (which hopefully will have germinated)

Did you know that today's Friday the 13th? Day 13?! Am I jinxing myself?

Watch for next week's update!

Krystal

Sunday, May 01, 2011

My Ginormous Pumpkin

So the time has come: for giant pumpkin growing! I went to the Giant Pumpkin growing class at Mountain Valley Seeds on Saturday and now I am ready. Well...so maybe that's not completely true. Let's just say I'm a little more ready than I was on Friday. At least I've got a seed to grow; two in fact. One is from the state record holder last year: Mconkie, and the other is from Israelsen, the winner from the year before. I'm going to do a little experimenting....
I still need to prep a garden space big enough to grow a giant pumpkin (minimum 6' x 8'), which in my backyard requires loosening compacted rocky soil that was once underneath asphalt, then adding more topsoil and compost to make the soil grow-able, then extending the drip lines to cover the new garden space, then building a fence to keep the chickens out. After that I need to warm up the soil, by either covering it with some clear plastic or building a hoop house, as recommended by Andrew Israelsen, teacher of the class I went to and president of the Utah Pumpkin Growers Association. Also owner of one of the gigantic seeds that I got from Mountain Valley to grow.

I was so excited after I got home from the workshop on Saturday that I finished digging up the asphault (which was mostly already done thanks to our neighbor Tim; we share a backyard) and started loosening the rocky soil underneath with a pick axe. After about 3 or 4 hours of digging, sifting out big rocks, shoveling and raking out soil, my hands were pretty sore so I called it a day. Today we did a bunch of weeding in my vegetable garden (which is on the NorthWest side of our house and in the front yard...a space probably only about 4' x 12'- not big enough (or concealed enough) to grow a majestic ginormous pumpkin fit enough for a boat.
That's right, a pumpkin boat. That's my goal. So I may not grow a 1167 lber Utah state record holder, but my ultimate goal is not about weight, it's about size. All I need is a pumpkin big enough to make a boat and sit inside (still a few hundred pounds I suppose- we will see). Ever since I saw a giant pumpkin boat race in Damariscotta, Maine in 2008, I've had a secret desire to grow a giant pumpkin and race it. Now's my chance. I've got the seed. I've got the space (with a little more work) and I've got a friend to race (Carly- it.

So here's the seed. This one is the israelsen:


Today I planted it in a four inch pot in some organic seed starter mix with some compost and kelp meal mixed in. I put it on top of my fridge to germinate.

My other seed, the McConkie (state winner last year and new record holder) I am thinking about germinating without soil (you know the same way we did in elementary school- in a damp paper towel on top of a fridge) then planting directly in the ground once the danger of frost has passed- mid may?

We will see which plant does better. I have always heard that pumpkins (and most cucurbits) prefer to be planted directly in the ground, but Mr. Israelsen transplants his...when it comes to giant pumpkins I am willing to experiment. Wish me luck!

Updates to follow.

Krystal mae